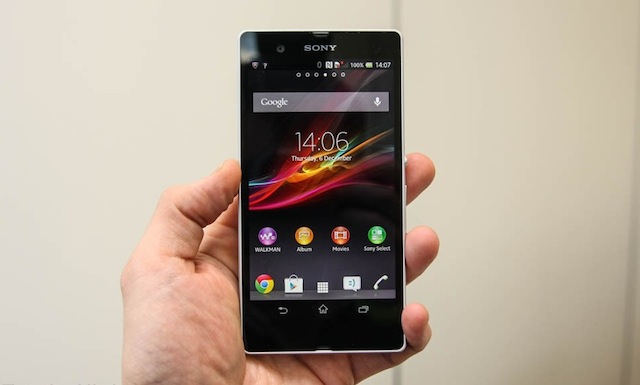
How To Root Xperia Z C6602 Android 4.2.2 Jelly Bean Official Firmware 10.3.1.A.2.67
Since firmware update 10.3.1.A.0.244, Sony patched the exploit to prevent root access to the device. Fortunately, XDA member DooMLoRD able to find a way to gain root access by flashing the previous kernel and roll back to the latest kernel. You may find it more complicated as compared to DooMLoRD easy root toolkit used for previous firmware 10.3.A.0.423. Nevertheless, this methods is no longer applicable on the latest firmware due to the patch by Sony.
If you already rooted your Xperia Z on 10.3.1.A.0.244 firmware and plan to update to latest 10.3.1.A.2.67 without losing root access, download OTA Root Keeper from Google Play Store and follow the steps in our previous guide. Else, you can always update to latest 10.3.1.A.2.67 firmware via OTA or manually update using Flashtool and apply DooMLoRD’s root method to regain root access on your Xperia Z.

Credit: www.gsmnation.com
Sony Xperia Z is one of the latest flagship android smartphone. It is equipped with 1.5GHz quad core Qualcomm Snapdragon S4 Pro processor with GPU Adreno 320. It has 2GB RAM and internal 16GB internal storage, an additional 64GB SD card slot. Sony Xperia Z has a 5 inch TFT Full HD (1920 x 1080 pixels) display with 441 ppi pixel density. It has also an non-removable battery with NFC. Sony Xperia Z is known as of its well water-resistant and dust resistant features. It works and can stands for about 30 minutes in 3m water depth. Android 4.1.2 Jelly Bean is the stock operating system firmware out of the box, pre-installed with Sony Mobile Battery Saving Mode.
How To Root Sony Xperia Z C6602 on Android 4.2.2 Jelly Ben Firmware 10.3.1.A.2.67
Disclaimer: It’s always a risk to modify your device. We, Android Teen are not responsible for any damage or bricks on your device. Your device warranty may void with any mod. Check your devices warranty’s term & conditions before start.(HTC,Samsung,LG, Sony, Motorola). Use this guide on your own risk, contact us for help if you face problem.
Pre-requisites & Requirements
- Sony Xperia Z C6602 with stock 10.3.1.2.67 firmware (Ensure correct device model and firmware; Check device model – Go to Settings -> About Device -> Model Number)
- Windows-based computer or laptop
- Download Sony Xperia Z USB driver for Windows and install in your computer.
- Connect device to computer with USB cable to complete installation.
- Skip this step if you have installed the USB driver.
- Enable USB Debugging on your device. How to Enable USB Debugging Mode on Android Devices.
- Make sure your phone is charged to 60% 80% to avoid battery blackout and interruption during this tutorial.
- We recommend you make a backup on your data and media files before the tutorial. You may restore the data and files if necessary.
- How to Completely Backup Android Without Root
- How to Backup Personal Data on Android Device (Contact, Application Data, Wifi Password, APN Settings)
- Backup SMS and Restore on Android Devices
- How to Backup WhatsApp Messages
- (Complete back up for rooted Android Devices)
Reminder: Flashing kernel will wipe phone date, ensure you make a backup before proceed. Besides that, ensure you meet the requirements before proceed. Contact us if you face problem.
Download
- Xperia Z C660X 10.3.A.0.423 Kernel (XperiaZ_C660X_KernelOnly_10.3.A.0.423_Generic_NL.ftf | 7.12 MB) – Source
- DooMLoRD Rooting Toolkit (DooMLoRD_Easy-Rooting-Toolkit_v18_perf-event-exploit.zip | 2.96 MB)
- Xperia Z C660X 10.3.1.A.2.67 Kernel (XperiaZ_C660X_KernelOnly_10.3.1.A.2.67.ftf | 7.17 MB)
- Sony Flashtool (flashtool-0.9.11.0-windows.exe | 112.77MB)
Instructions:
- Download Sony flashtool into your computer. Double click on the flashtool.exe file to install. You should see a flashtool folder in C Drive.
- Double click on flashtool icon in the folder mentioned in Step 1 to launch flashtool.
- For first timer, navigate to C:\Flashtool\drivers folder to install “Flashtool-drivers”. Select and check the box of your device model and Flashmode Drivers.
- While your device is powered on, connect your device to computer with USB cable. Make sure all drivers are installed properly before start.
- Download XperiaZ_C660X_KernelOnly_10.3.A.0.423_Generic_NL.ftf and XperiaZ_C660X_KernelOnly_10.3.1.A.2.67.ftf, copy to flashtool/firmwares folder in computer.
- On the flashtool, click on the lightning icon and click flashmode, then “ok”.
- You should see a new windows.
- At the right sidebar, check “Data, Cache, Appslog” boxes if you wish to wipe the device before flash. To remain your device data, uncheck all the boxes.
- At source folder, browse and choose “XperiaZ_C660X_KernelOnly_10.3.A.0.423_Generic_NL.ftf ” in the flashtool/firmwares.
- Press flash button to start flashing.
- Follow the prompt instructions.
- First, to unplug your device from PC.
- Second, power off your device.
- Third, enter to Flash Mode on your device by press and hold Volume Down button while connect your device with USB cable to computer.
- Forth, connect your device back to computer with USB cable. The screen display will still remain blank in dark.
- Monitor the Flashtool in computer. It should continue to run and flash the XperiaZ_C660X_KernelOnly_10.3.A.0.423_Generic_NL.ftf .
- Wait until the flash process to complete. You should see “Flashing finished” from the flashtool
- Reboot your device now.
- Connect your device to computer in USB debugging mode
- On computer, close the flashtool. This is a very important step.
- Download DooMLoRD_Easy-Rooting-Toolkit_v18_perf-event-exploit.zip and extract into a new folder in desktop
- Double click on the runme_file in the extracted folder in Step 21. This will root your device.
- After rooting, repeat Step 4 – 18 using XperiaZ_C660X_KernelOnly_10.3.1.A.2.67.ftf. These steps will eventually flash back the stock 10.3.1.A.0.244 kernel to your device.
- Download root checker to check your root status.
us or give us a if it works for you.


