Moto G 2014 Root & TWRP Installation Guide
October 19th, 2014

Sony is in the right track as they started to update Sony Xperia Tablet Z, one of the most beautiful built android tablet to latest Android 4.2.2 Jelly Bean. Official Jelly Bean for Sony Xperia Tablet Z is now available via OTA (Over the air) or Sony PC Companion for windows / Sony Bridge for Mac. No matter your Sony Xperia Tablet Z is with the latest Android 4.2.2 Jelly Bean or Android 4.1 Jelly Bean, our root tutorial here is workable and applicable for both of this firmware version. As what we understand, Android 4.2.2 Jelly Bean bring even more smoother buttery Jelly Bean performance, customized toggle button, improved notification menu bar and multiple lock screen feature with widgets.
10.3.A.0.407 is the certified Android 4.2.2 Jelly Bean firmware for Sony Xperia Tablet Z. As we mentioned earlier, the root method below is working for both Android 4.2 and Android 4.1 Jelly Bean. Root method below does not need additional steps to unlock your device bootloader. But it also works on unlocked bootloader device. In short, your device’s warranty should still valid after root. However, ensure you are clear what you going to do to gain the root access. Check out our post regarding the benefits of root before start and if you still have doubt to begin.
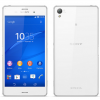
Sony Xperia Tablet Z is one of the best android tablet in market today with the elegant, stylish and solid design. It is equipped with 1.5GHz quad core Qualcomm Snapdragon S4 Pro APQ8064 processor with GPU Adreno 320. It has 2GB RAM and internal 16GB internal storage, an additional 64GB SD card slot. Sony Xperia Tablet Z has a 10.1 inch Full HD (1920 x 1200 pixels) display with 224 ppi pixel density. It has also a 6000mAh non-removable battery with NFC. Following its sibling product, Sony Xperia Z, Tablet Z is also a waterproof and dust resistant tablet (IP57). Sony Xperia Tablet Z come with Android 4.1.2 Jelly Bean as stock operating system firmware out of the box, and upgradable to Android 4.2.2 Jelly Bean.
Disclaimer: It’s always a risk to modify your device. We, Android Teen are not responsible for any damage or bricks on your device. Your device warranty may void with any mod. Check your devices warranty’s term & conditions before start.(HTC,Samsung,LG, Sony, Motorola). Use this guide on your own risk, contact us for help if you face problem.
Reminder: Ensure you make a backup before proceed. Besides that, ensure you meet the requirements before proceed. Contact us if you face problem.
us or give us a if it works for you.

.png)


October 19th, 2014

October 11th, 2014
September 29th, 2014

September 17th, 2014

September 2nd, 2014

Pingback: #TutorialROOT: Como rootear la Sony Xperia Z Tablet | TecnoGeek()